In our busy lives, a dead car battery can put a real damper on our day. But fear not! In this article, “How to Properly Jump-Start a Car,” we’ll cover the straightforward and essential steps to safely and effectively jump-start a vehicle, ensuring we’re back on the road in no time. Together, we’ll tackle the basics of using jumper cables, understanding the correct battery terminals, and taking important safety precautions. Let’s empower ourselves with the knowledge to handle this common roadside challenge with confidence and ease!
Have you ever found yourself in a situation where your car just refuses to start, especially when you are in a hurry? It’s a common scenario that can happen to any of us. Knowing how to properly jump-start a car can be a lifesaver, saving us time, stress, and sometimes money. In this guide, we’ll walk through the step-by-step process to safely and effectively jump-start a car, along with some tips and precautions to keep in mind.

Introduction to Jump-Starting a Car
Jump-starting a car might seem daunting if you’ve never done it before. However, with the right information and precautions, it becomes an easy and useful skill to have. Whether we’re helping a friend or our own car won’t start, understanding the process can get us back on the road quickly.
Necessary Tools and Equipment
Before we begin, it’s essential to ensure we have the right tools and equipment on hand. Here’s what we need:
- Jumper Cables: A pair of jumper cables with thick, heavy-duty wires is ideal.
- Another Vehicle with a Fully Charged Battery: This will be our power source.
- Safety Gear: Gloves and safety glasses, if available, to protect against sparks or battery acid.
By ensuring we have these items, we set ourselves up for a smoother, safer process.
Initial Preparations
Let’s start by making some safety preparations to ensure everything goes smoothly:
Positioning the Vehicles
We need to park the working vehicle close enough to the car with the dead battery so that the jumper cables can reach both batteries. However, the vehicles shouldn’t be touching. Here’s how we can position them:
| Vehicle Placement | Criteria |
|---|---|
| Distance | Close enough for cables to reach but not touching |
| Placement | Facing each other or side by side |
| Parking | Secure the vehicles with handbrakes and turn off both ignitions |
Inspecting the Batteries
Before connecting anything, we should inspect both batteries for any visible damage such as cracks, leaks, or corrosion. If we see any signs of damage, it may be safest to call for professional assistance.
Step-by-Step Guide to Jump-Starting a Car
Now, let’s dive into the step-by-step process to jump-start our car. It’s crucial to follow these steps carefully to avoid any damage or injury.
Step 1: Connect the Jumper Cables
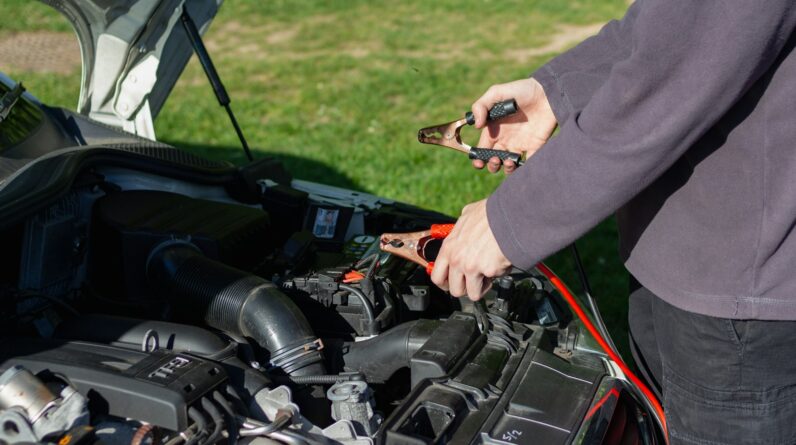
- Red Cable – Positive Terminal (+):
- Connect one end of the red (positive) jumper cable to the positive terminal of the dead battery.
- Connect the other end of the red (positive) jumper cable to the positive terminal of the good battery.
- Black Cable – Negative Terminal (-):
- Connect one end of the black (negative) jumper cable to the negative terminal of the good battery.
- Connect the remaining end of the black (negative) jumper cable to an unpainted metal surface on the engine block or frame of the car with the dead battery. This acts as a ground and helps prevent sparks.
By connecting in this order, we minimize the risk of short circuits and sparks near the battery.
Step 2: Start the Vehicles
- Start the Working Vehicle: Let it run for a few minutes. This allows the dead battery to receive some charge.
- Start the Car with the Dead Battery: Attempt to start the car with the dead battery. If it starts, let both vehicles run for a few minutes to ensure the battery is stable.
Step 3: Disconnect the Jumper Cables
Once the car with the dead battery starts, careful disconnection of the jumper cables is crucial. Disconnect in the reverse order of connection:
- Remove the black (negative) cable from the car that was jump-started.
- Remove the black (negative) cable from the car that provided the jump.
- Remove the red (positive) cable from the car that provided the jump.
- Finally, remove the red (positive) cable from the car that was jump-started.
Step 4: Let the Car Run
Let the jumped vehicle run for at least 20 to 30 minutes, or drive it around. This ensures that the alternator recharges the battery sufficiently.

Troubleshooting Common Issues
Even if we follow all the steps correctly, sometimes the car might not start. Here are a few common issues and solutions:
| Issue | Solution |
|---|---|
| Car Won’t Start | Ensure all connections are secure and retry. Check the battery terminals for corrosion. |
| Sparks While Connecting | Make sure the cables are connected in the correct order. |
| No Power Even After Jump | The battery might be beyond the point of jump-starting, or there could be an issue with the vehicle’s alternator. Consider professional help. |
Safety Precautions
Safety should be our priority at all times. Here are some critical safety tips to keep in mind:
- Avoid Contact: Never touch both terminals at the same time.
- No Smoking or Open Flames: Batteries emit gases that are flammable.
- Proper Cable Storage: Ensure jumper cables are in good condition and properly stored.
By adhering to these precautions, we greatly reduce the risk of accidents.

Understanding Battery Maintenance
A well-maintained battery is less likely to leave us stranded. Here are some maintenance tips:
Regular Inspections
- Visual Check: Inspect for corrosion, cracks, or leaks.
- Clean Terminals: Use a mixture of baking soda and water to clean corroded terminals.
Avoid Frequent Short Trips
Frequent short trips can prevent the battery from fully charging. Combining errands into longer trips can help maintain battery health.
Consider a Battery Charger
Investing in a portable battery charger can keep our battery healthy, especially during cold weather.
When to Replace Your Battery
Despite our best efforts at maintenance, all car batteries have a limited lifespan. Here are signs that it might be time for a replacement:
| Sign | Description |
|---|---|
| Slow Engine Crank | Taking longer than usual to start the engine. |
| Corrosion | Excessive corrosion on battery terminals. |
| Dim Lights | Headlights and interior lights dim even when the engine is running. |
| Battery Age | Over 3-4 years old, consider a check-up or replacement. |
Professional Help
Sometimes, a jump-start won’t be enough, and professional help may be needed. Here’s when to call a professional:
- Persistent Issues: Continued starting problems even after a jump.
- Unidentifiable Problems: When the cause of the issue isn’t apparent.
- Damaged Battery: Visible damage to the battery or cables.
Conclusion
Knowing how to properly jump-start a car is an essential skill that can save us time and inconvenience. It’s a straightforward process if we follow the steps meticulously and take necessary safety precautions. Regular battery maintenance and understanding when to seek professional help will ensure that we aren’t caught off guard by a dead battery in the future.
By mastering these simple steps and tips, we can confidently handle a dead battery situation and even assist others when the need arises. Here’s to safer and smoother drives ahead!


